Transfer Post with clearing (F-51)
Menu: Accounting > Financial Accounting > Accounts Payable > Document Entry > Other > With Clearing
Process Overview: Clear open item by G/L account.
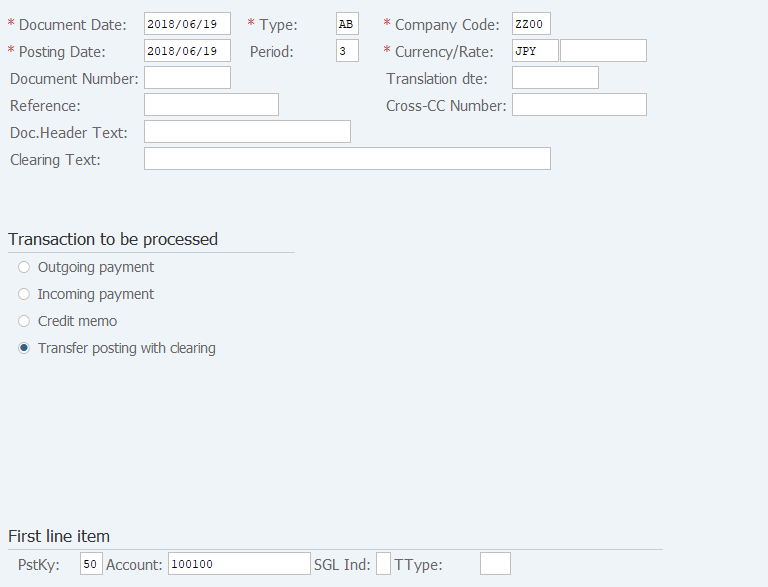
Screen 1:
Operation Process:
| 1. | {{Document Date}} | Enter any date. (Used as a substitute for a memorandum) | |
| 2. | {{Type}} | Enter the code for classifying the document. (Ex. 'KZ' Vendor payment) | |
| 3. | {{Company Code}} | Enter the Company code for managing the document. (Normally, own company code) | |
| 4. | {{Posting Date}} | Enter the document management date. (Ex. Enter '2016.04.xx' for the document of April 2016.) | |
| 5. | {Period} | Enter the Accounting period for managing the document. (Calculated automatically based on the posting date) | |
| 6. | {Currency} | Currency code for managing the item amount. Change if the operation is a foreign currency entry. (Ex. 'JPY' Japanese Yen) |
|
| 7. | {Rate} | Enter the Rate when entering a foreign currency. (Not required for the local currency) | |
| 8. | {Doc. Header Text} | Enter the document abstract. | |
| 9. | {{Transaction to be processed}} | Tick [Transfer posting with clearing]. | |
| First line item | |||
| 10. | {{PstKy} | Enter the item management key of the 1st item. (Ex. '50' Credit entry) | |
| 11. | {{Account}} | Enter the Account code of the 1st item. (Ex. Cash/deposit account) | |
| 12. | Press [Enter] key. | ||
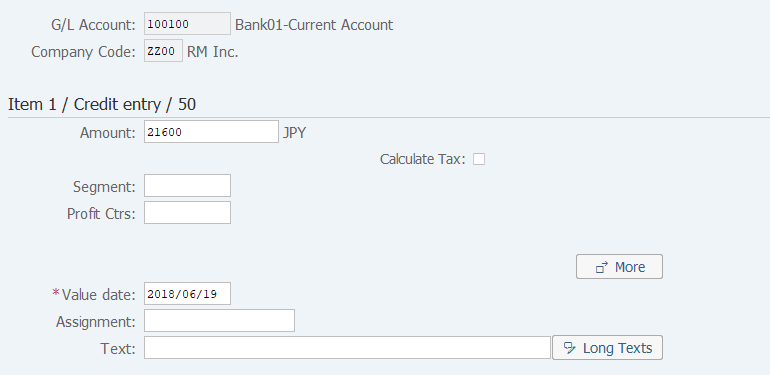
Screen 2:
Operation Process:
| 1. | {{Amount}} | Enter the payment amount. | |
| 2. | {Calculate Tax} | Select when Calculating a consumption tax automatically. | |
| 3. | {Value date} | Enter the date when the actual current deposit account was moved. | |
| 4. |  |
Click [More]. |
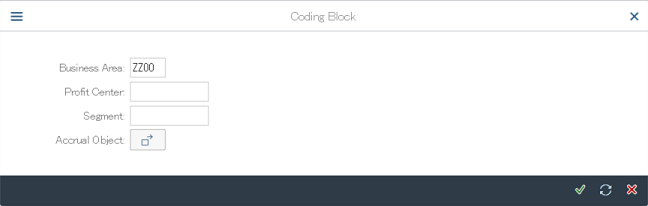
Screen 3:
Operation Process:
| 1. | {{Business Area}} | Enter the Business area of the item. | |
| 2. |  |
Click [Continue]. |
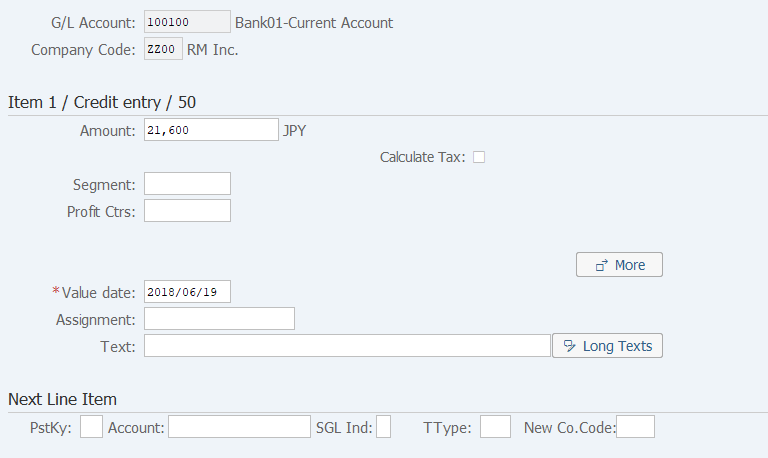
Screen 4:
Operation Process:
| 1. |  |
Click [Choose open items]. |
Screen 5:
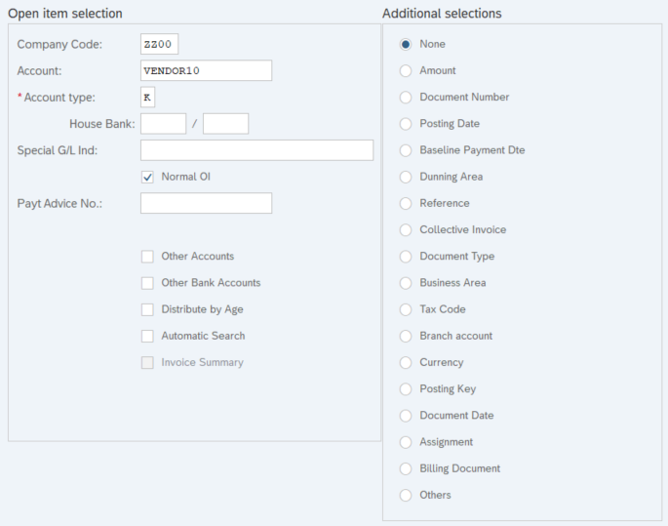
Operation Process:
| Open item selection | |||
| 1. | {{Company Code}} | Enter the Company code for managing the document. (Same as Screen 1) | |
| 2. | {{Account}} | Enter the Vendor account to be cleared. | |
| 3. | {{Account Type}} | Select the Account type 'K'. (Indicates that the account input column is a vendor.) | |
| 4. | {{Normal OI}} | Select this option when targeting normal item. | |
| 5. | {Special G/L Ind} | When displaying Special G/L data (item that uses Special G/L), enter the Special G/L code. (Entry of multiple codes is allowed.) |
|
| 6. |  |
Click [Process Open Items]. | |
Screen 6:
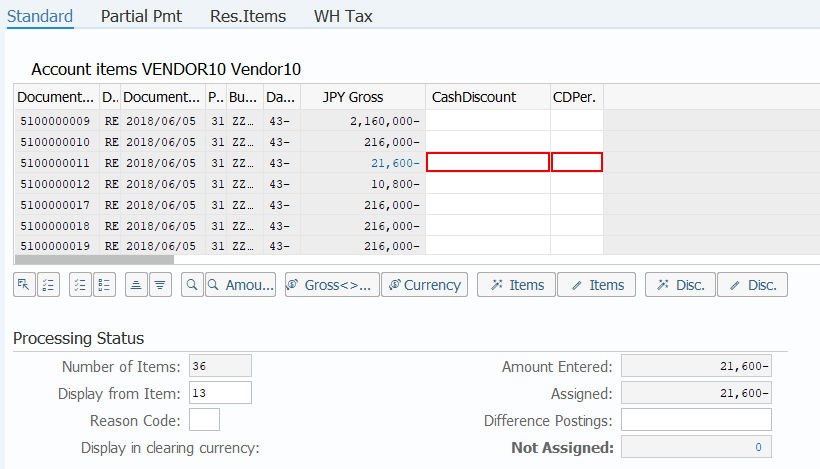
Operation Process:
| 1. | {{JPY Gross}} | Double-click on the 'JPY Gross' amount of the document and select an item. (The selected item is displayed in blue.) | |
| 2. | {{Not Assigned}} | Check that the clearing amount and assigned amount match (Not assigned is '0'). | |
| 3. |  |
Click [Document Overview]. |
Supplement :
| 1. | When the document number is double-clicked, the item overview can be checked. | |
| 2. | The item field that is displayed on the screen varies according to the setting described in the manual "03-03-05 Payment Clearing Setting Change" (FB00). |
Screen 7:
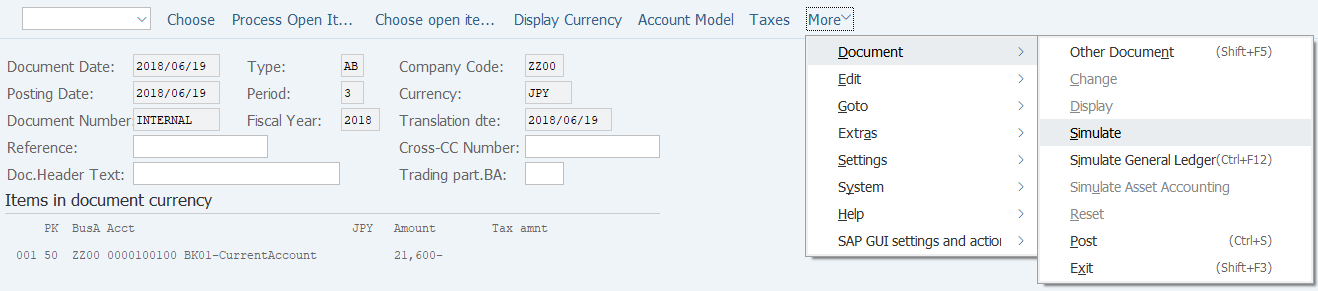
Operation Process:
| 1. | Menu: More > Document > Simulate (The overview of the document to be posted can be checked through simulation.) |
Screen 8:
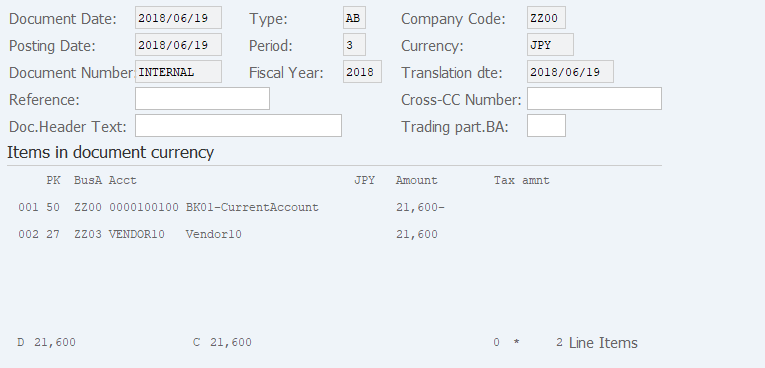
Operation Process:
| 1. |  |
Click [Post]. |
Remarks:
| 1. | When changing the item, double-click on the item and make the necessary change. | |
| 2. | After taxable amount automatic calculation is selected, a tax account is added to the item after simulation. Check the amount. |

Copyright(c) MITSUI KINZOKU YOURSOFT Inc.