Automatic Payment (F110)
Menu: Accounting > Financial Accounting > Accounts Payable > Periodic Processing > Payments
Process Overview: Select an uncleared invoice and automate the posting for payment documents and printing of payment media.
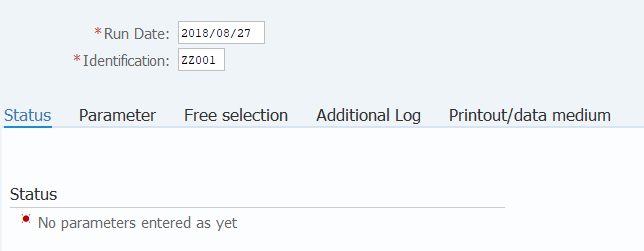
Screen 1: Enter Run Date & Identification which are used as a key for Automatic Payment Transaction
Run Date: Input of an identification name
Operation Process:
| 1. | {{Run Date}} | Enter the payment date. | |
| 2. | {{Identification}} | Enter the identification name of the person in charge of payment (person in charge of the fund) | |
| 3. |  |
Select the [Parameter] tab. (Input of payment condition) |
Remarks:
| 1. | Specify 'Company code (or Business area) + any information' for the identification name to avoid duplication with the person in charge. | |
| 2. | When executing twice or more on the same date, assign a sub-number to the identification name. |
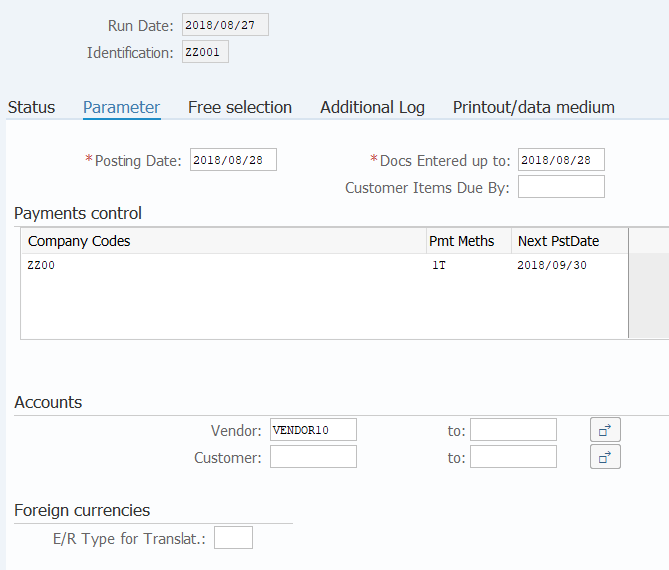
Screen 2: Enter execution condition for Payment run such as Company code, Payment method, Vendor code, Posting date.
Operation Process:
| 1. | {{Posting Date}} | Enter the Posting date of the document that is cleared automatically by payment processing. (Initial value: Execution date) | |
| 2. | {{Docs entered up to}} | Enter the last date when the document is entered as the selection condition. | |
|
Payments control |
|||
| 3. | {{Company codes}} | Enter the Company code as the operation target. | |
| 4. | {{Pmt meths}} | Enter the Payment method as the operation target. (Multiple methods are allowed) | |
| 5. | {{Next p/date}} | Enter the next payment date or the date following the posting date. | |
|
Accounts |
|||
| 6. | {{Vendor}} | Enter the Vendor account as the operation target. | |
| 7. |  |
Select the [Free selection] tab. (Input of selection condition) | |
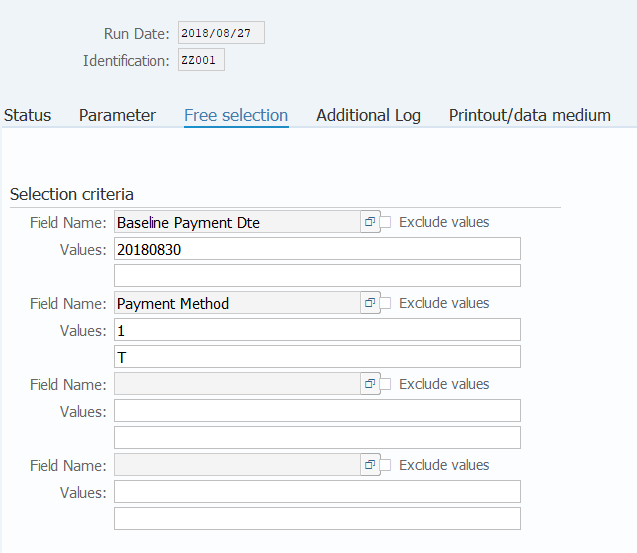
Screen 3: Enter an additional condition for Payment run
Operation Process:
| 1. | {{Field Name}} | Click
 [Select] in the field name and specify "Document" in Field selection. [Select] in the field name and specify "Document" in Field selection. Select a Baseline Payment date (BSEG-ZFBDT). (Payment method is also allowed). |
|
| 2. | {{Values}} | Enter the Baseline date applicable to the value. (When 'Payment method" is selected, enter the applicable payment method.) | |
| 3. | {{Field Name}} | Click
[Select] in the field name and specify "Document" in Field selection. Select Payment Method (BSEG-ZLSCH). (A baseline date is also allowed.) |
|
| 4. | {{Values}} | Enter the Applicable payment method to the value. (When selecting Baseline Date, enter the applicable baseline date.) | |
| 5. |  |
Select the [Additional Log] tab. |
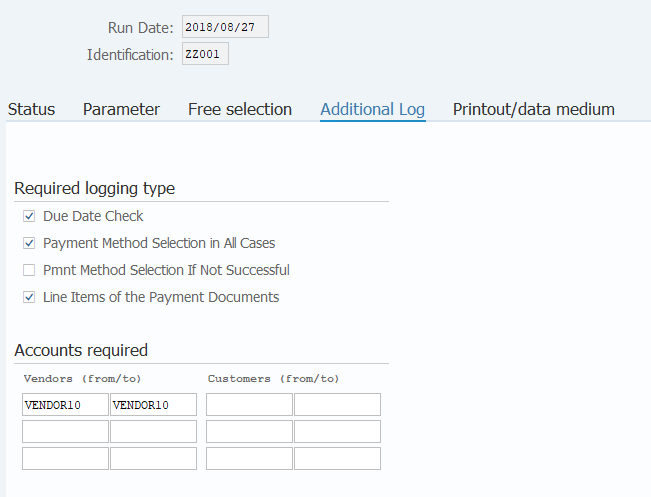
Screen 4: Select Log to confirm the execution result.
Operation Process:
|
Required logging type |
|||
| 1. | {{Due date check}} | Tick. | |
| 2. | {{Payment method selection in all cases}} | Tick. | |
| 3. | {{Lime items of the payment documents}} | Tick. | |
|
Accounts required |
|||
| 4. | {{Vendors}} | Enter the Vendor account that was input in Screen 2. | |
| 5. |  |
Select [Print/data medium] tab. | |
Screen 5: Select Printer format(variant:Usually same as your Company code) for creating Bank transfer data.
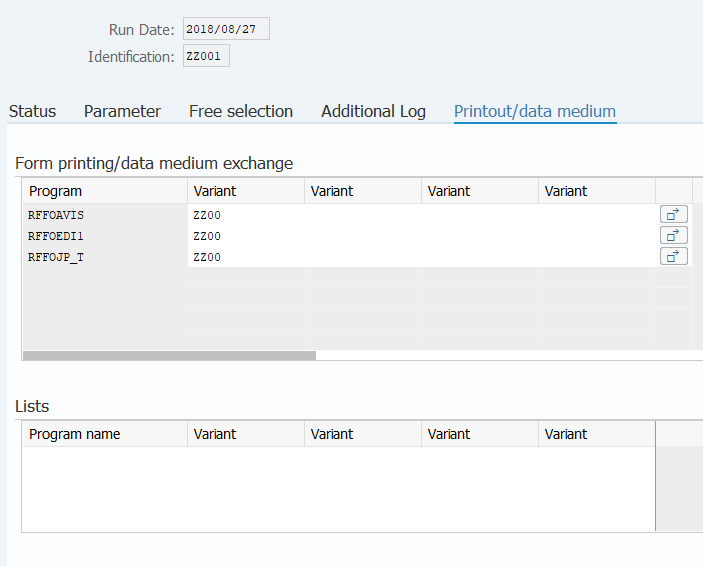
Operation Process:
| 1. | {{Variant}} | Select the applicable variant. (Normally, Company code) | |
| 2. |
 |
Click [Save Parameters]. | |
| 3. |  |
Select the [Status] tab. |
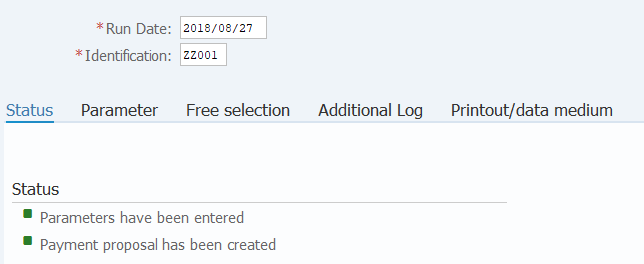
Execution of payment proposal (verification of payment schedule)
Screen 6: Confirm that the execution condition of Payment run is saved without error.
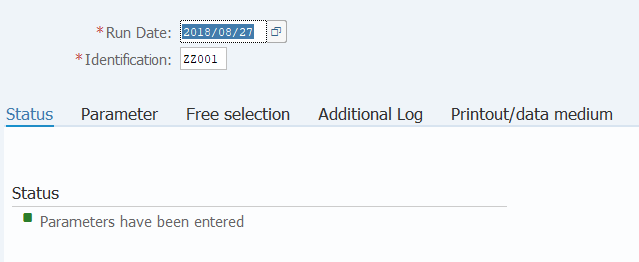
Operation Process:
| 1. |
 |
Click [Schedule proposal]. |
Screen 7: Enter the parameter for 'Proposal'. SAP will output the Vendor open item list which fit the condition.
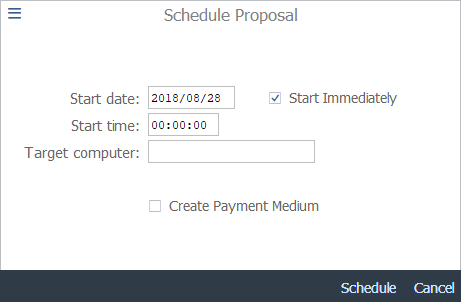
Operation Process:
| 1. | {{Start immediately}} | Tick. | |
| 2. |
 |
Click [Schedule]. (Execution of proposal processing) |
Supplement :
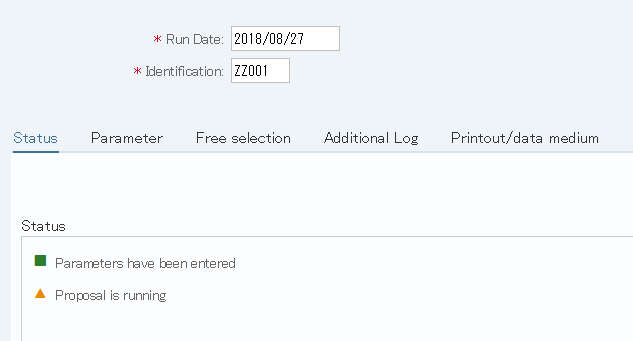
| 1. | Initially, 'Proposal ready to be started' is displayed as the status. | |
| Perform the following processing until 'Payment proposal has been created' is displayed. | ||
| 2. | Since the status does not change
automatically, check the latest status by click
 [Status]. [Status]. |
↓
Confirmation of proposal data
Screen 8: Confirm Vendor open list.
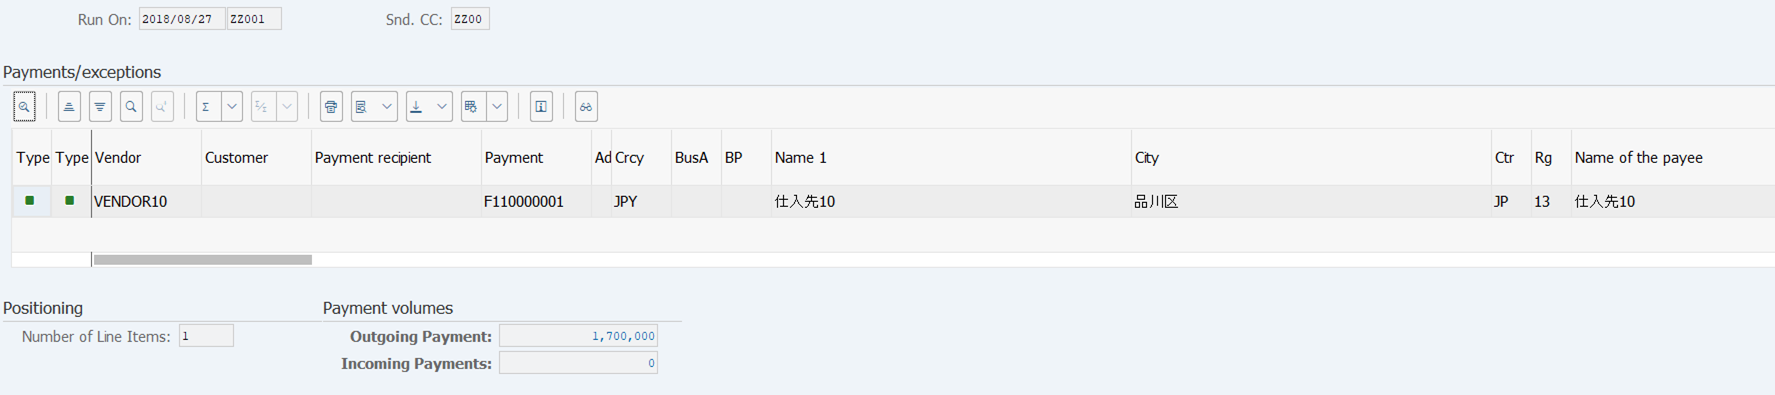
Operation Process:
| 1. |
 |
Check the proposal list by click [Display proposal]. (More: Edit > Proposal > Display Proposal) | |
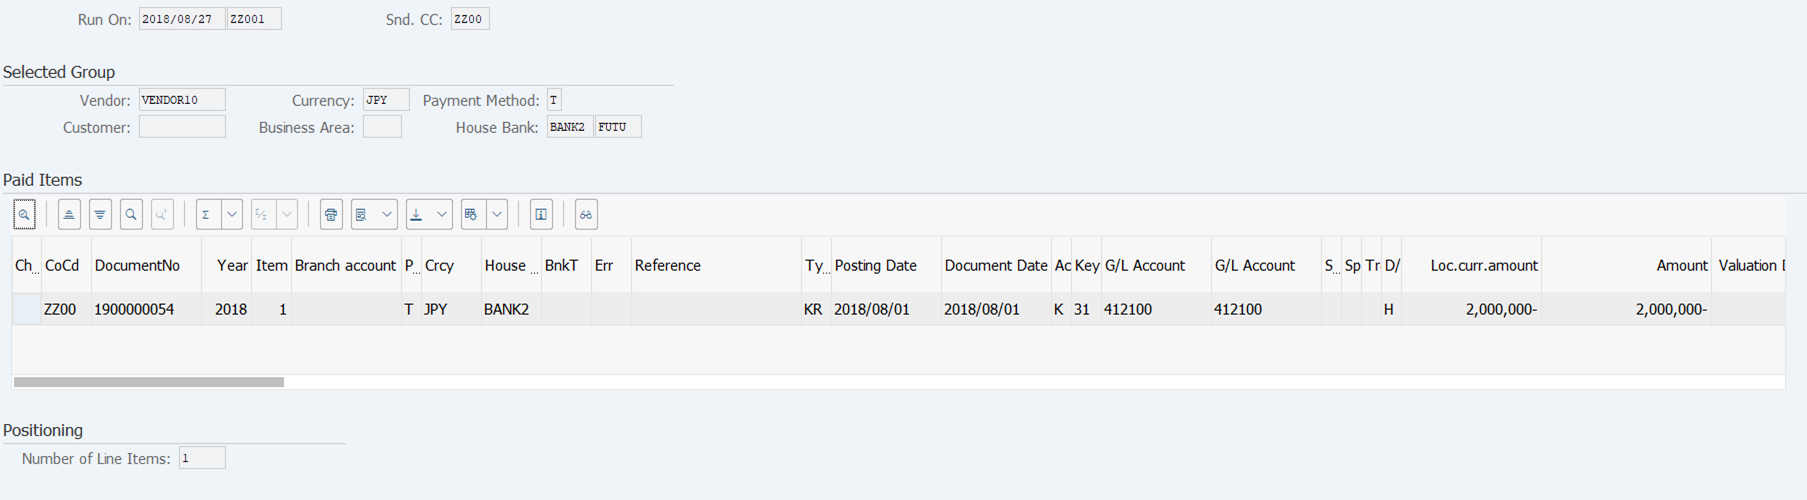
| 2. | Payment data confirmation | Confirm the payment data that is selected in proposal plan processing. |
| 3. |
 |
Click [Back]. Control automatically returns to the payment processing screen. |
Remarks:
| 1. | When detecting the data to be modified from the proposal list, delete the proposal data, modify the document, and perform proposal plan processing again. Up to this stage, control can be returned to the previous stage (repeat) after modifying the document. | |
| * For information about how to delete a proposal, refer to the manual No.03-02-04. | ||
| 2. | Although the processing can be repeated up to the proposal plan, subsequent processing (payment plan) cannot be re-done until uncleared items are cleared. | |
| Check the proposal contents. (Confirmation item: Execution date, vendor code, house bank, amount, and so on) |
Execution of payment plan (clearing of uncleared items)
Screen 9: Confirm that Proposal process has been finished without error.
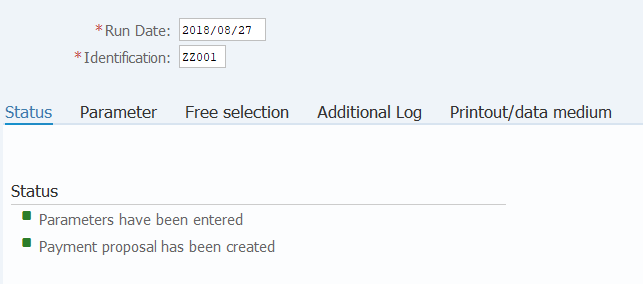
Operation Process:
| 1. |
 |
Click [Schedule payment run]. |
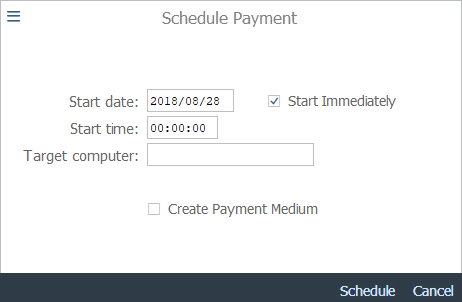
| 2. | {{Start immediately}} | Tick. | |
| 3. |
|
Click [Schedule]. (Run payment processing.) |
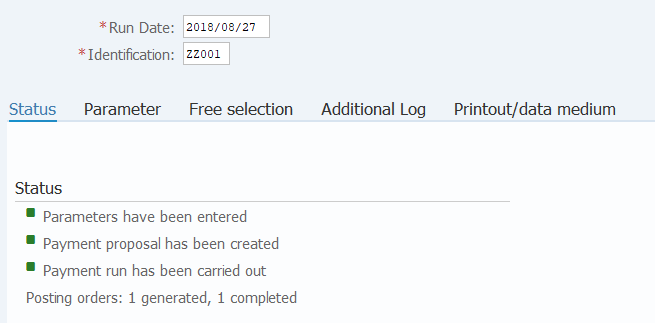
| 4. | |
Click [Status] to check the latest execution status. | |
| 5. | Status | Confirm 'Payment run has been carried out'. |
Payment Confirmation
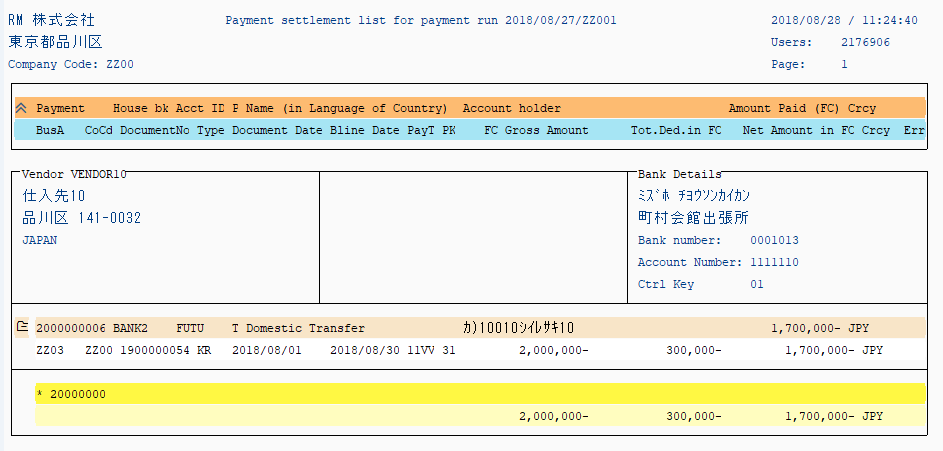
Screen 10: Confirm the posted document from 'Printout' run in the list form.
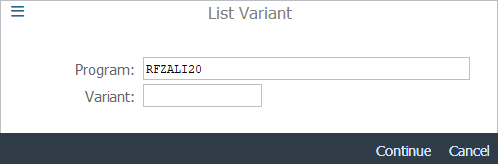
Operation Process:
| 1. | More: Edit > Payments > Payment list | ||
| 2. |
 |
When [Continue] is click, a payment list is displayed. Check the contents. |
| 3. |
|
Click [Back]. |
Printing payments (creating an all-banks file)
Screen 11: Execute 'Printout' and create Bank transfer data.
Operation Process:
| 1. |
 |
Click [Schedule Print]. |
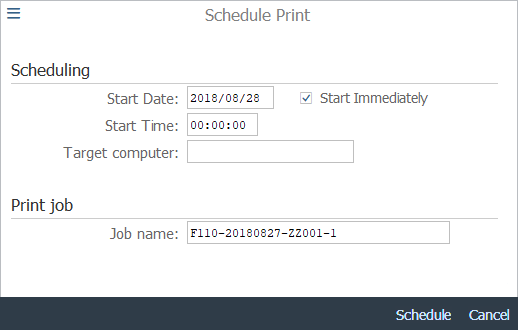
|
Scheduling |
|||
| 2. | {{Start immediately}} | Tick. | |
|
Print job |
|||
| 3. | {{Job name}} | Change '?' at the end of the job name. (Enter a serial number: normally, '?' is changed to '1') | |
| 4. |
|
Click [Schedule]. (A print plan processing is executed.) | |
Screen 12: Confirm the result of 'Printout' from the log.
Operation Process:
| 1. |
 |
Click [Display payment run log]. |
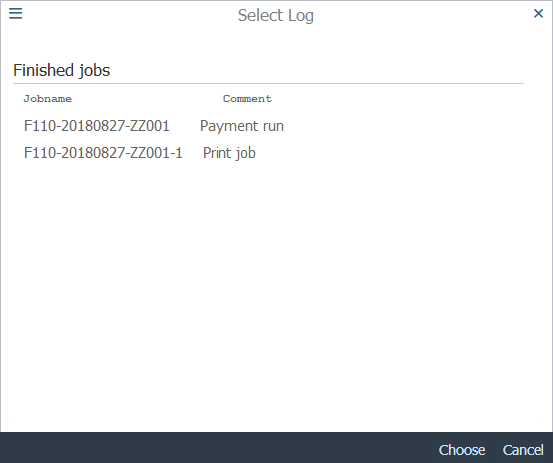
| 2. | Selecting a print job | Select the name of the print job entered in the print plan. (Double-click the name) |
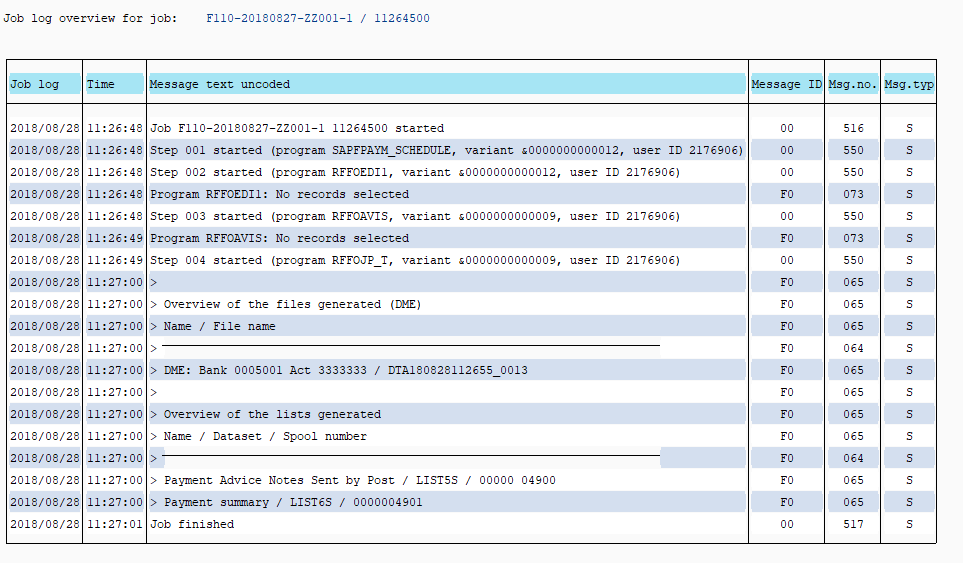
| 3. |
|
Click [Back]. |
Remarks:
| 1. | Confirm that the print job message reads "Job finished". | |
| The processing is discontinued if there is an error in the vendor master. | ||
| Try after correcting the master. (Check repeatedly until the error is gone) |
Checking an all-banks file
Screen 13: Confirm Bank transfer data.

Operation Process:
| 1. | More: Environment > Payment Medium > DME Administration. | |
| 2. | Select the file to be checked/downloaded. (When a column is selected, the color of the entire column changes) | |
| 3. | More: Edit > Display DME contents |
Screen 14: Confirm Bank transfer data (check with eyes).
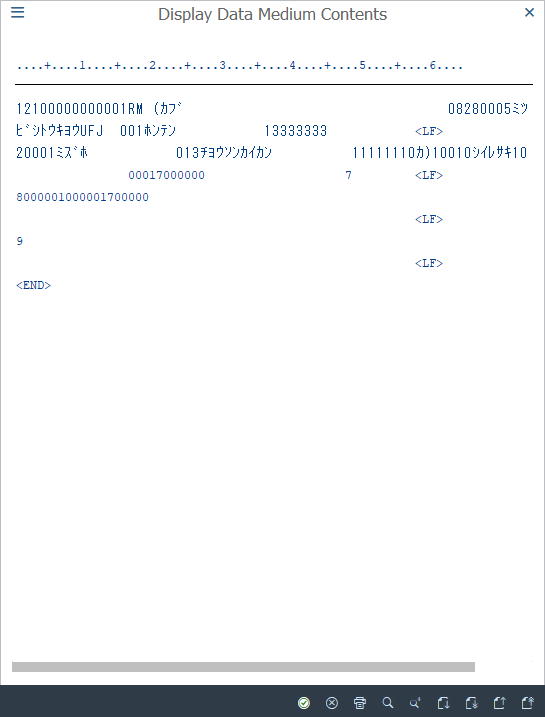
Operation Process:
| 1. |
 |
Click [Continue] and return control to Screen 13. |
Supplement :
| 1. | The transfer requestor code, etc. can be checked. |
Downloading
Screen 15: Download Bank transfer data to your PC from SAP server.
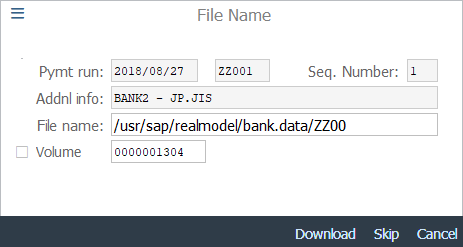
Operation Process:
| 1. | More: Edit > Download... | ||
| 2. | {{File name}} | Enter the name of the download destination file. (Directory and file name in your computer) | |
| 3. |
 |
Click [Download]. |
Supplement :
| 1. | There is no specific rule for the file name. |
Creating a payment summary (checking the bank transfer fee)
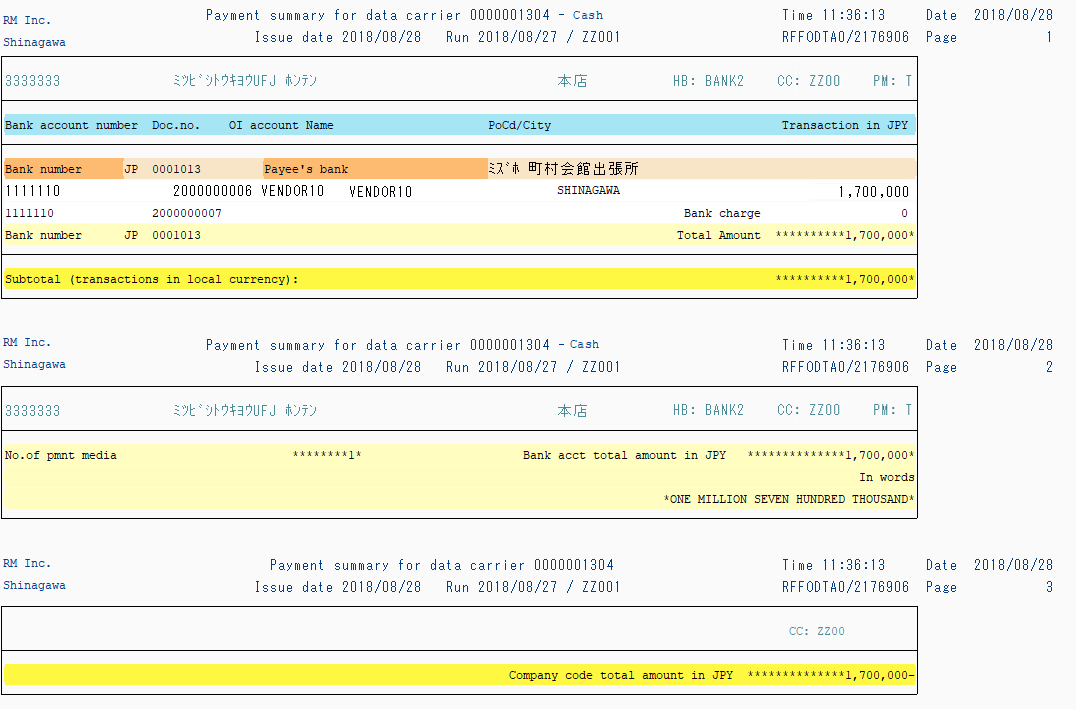
Screen 16: Create Payment summary to confirm transfer fee & transfer amount.
Operation Process:
| 1. | More: Environment > Payment summary |
Screen 17: Select the printer for output.
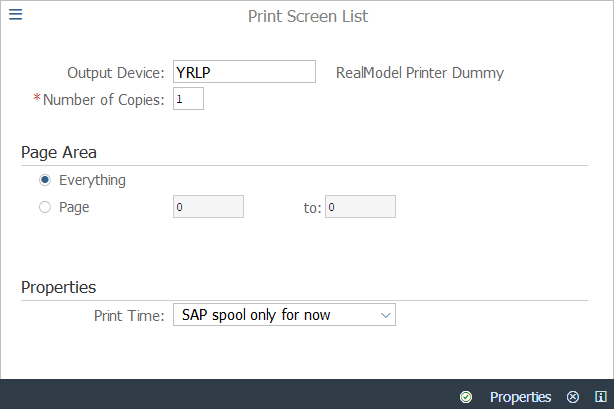
Operation Process:
| 1. | {{Output Device}} | Specify the printer to which to output payment summary. (Ex. YRLP: dummy printer) | |
| 2. |
|
Click [Continue]. (Printing is initiated.) |
Supplement:
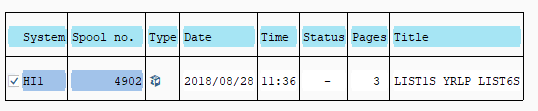
| 1. | If 'YRLP' (dummy printer) is specified as the output device, the data will be pooled in a spool, which can then be checked on the screen. |
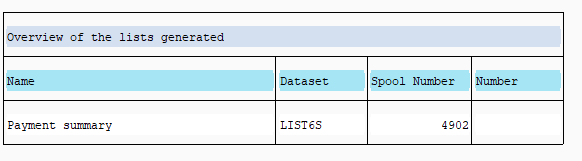
| 2. | {{Name}} | Click 'Payment summary'. |
| 3. |
 |
Select a system ( ) and then click
[Display contents]. ) and then click
[Display contents]. |
Copyright(c) MITSUI KINZOKU YOURSOFT Inc.