Back to Menu No.02-03-03
Notes Receivable Withdraw (YRFI0001)
Menu: Accounting > Financial Accounting > Add: Function > Add: Accounts Receivable > Notes receivable withdraw
| Process Overview: | Manage the status of incoming bills of exchange and electronically recorded monetary claims ((1)Collection), and post FI document when it is process ((2)Conveyance or (3)Discount ). |
Remarks: The status of a physical bill of exchange must be registered in advance.
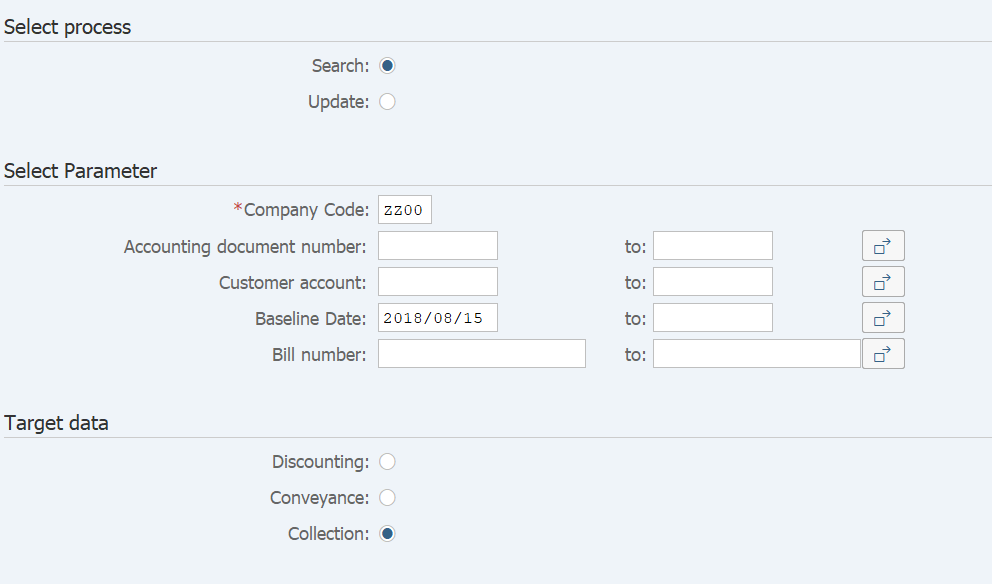
Screen 1:
Operation Process:
| Select process | |||
| 1. | {{Search}} | Tick. | |
| Select Parameter | |||
| 2. | {{Company Code}} | Enter the Company code. | |
| 3. | {Accounting document number} | Enter the Document number. | |
| 4. | {Customer account} | Enter the Customer code. | |
| 5. | {Baseline Date} | Enter the Baseline date for payment. | |
| 6. | {Note number} | Enter the physical bill of exchange number (assignment number). | |
| Target data | |||
| 7. | {{Collection}} | Tick. | |
| 8. |
 |
Click [Execute]. | |
Screen 2:
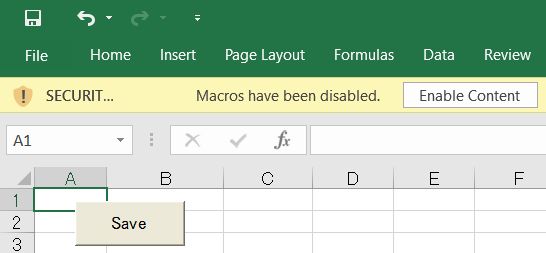
Operation Process:
| 1. |  |
Click [Enable Content]. |
Screen 3:

Operation Process:
| 1. | {Necessary/Not necessary} | Enter 'X' (single-byte capital) for any unnecessary data. | |
| 2. | {{Bill status}} | Enter the status of the physical bills of exchange to be collected at the bank. | |
| 3. |  |
Click [Save]. |
Screen 4:
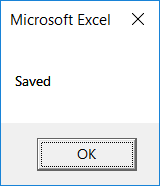
Operation Process:
| 1. |  |
Click [OK]. |
Screen 5:
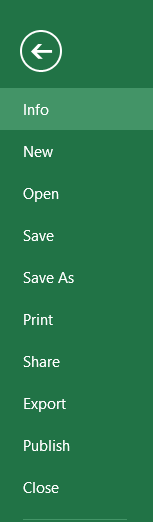
Operation Process:
| 1. | Menu: Excel Icon > Close |
Screen 6:
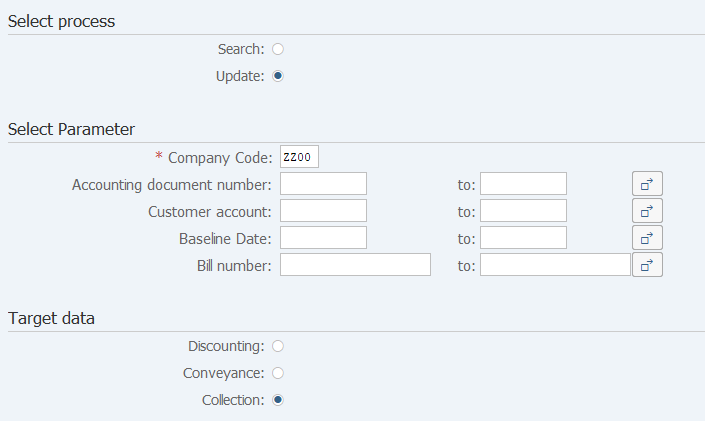
Operation Process:
| Select process | |||
| 1. | {{Update}} | Tick. | |
| Target data | |||
| 2. | {{Collection}} | Tick. | |
| 3. |
|
Click [Execute]. | |
Screen 7:
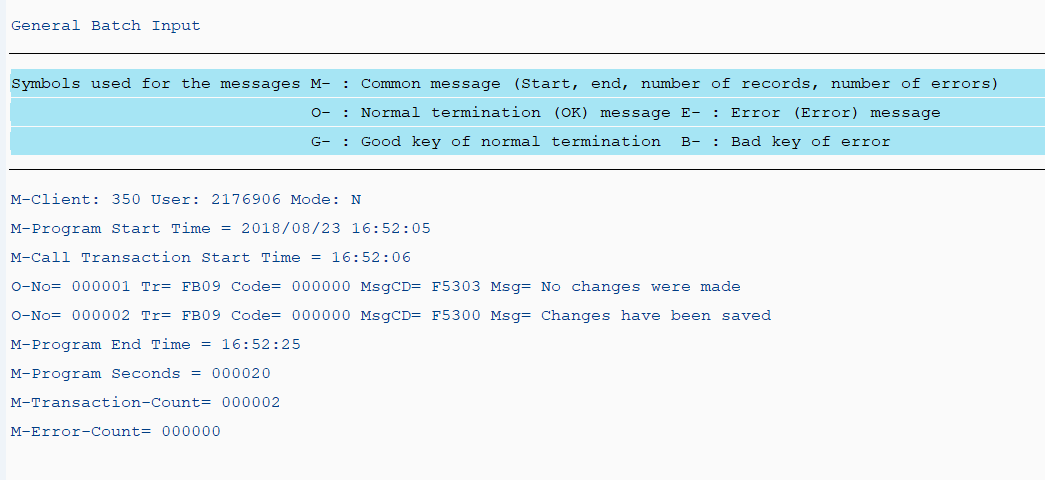
Operation Process:
| 1. | Make sure that there are no errors. |
Screen 1:
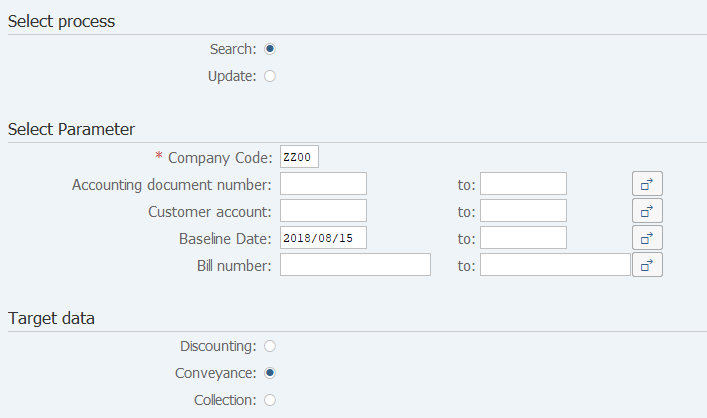
Operation Process:
| Select process | |||
| 1. | {{Search}} | Tick. | |
| Select Parameter | |||
| 2. | {{Company Code}} | Enter the Company code. | |
| 3. | {Accounting document number} | Enter the Document number. | |
| 4. | {Customer account} | Enter the Customer code. | |
| 5. | {Baseline date} | Enter the Baseline date for payment. | |
| 6. | {Bill number} | Enter the physical bill of exchange number (assignment number). | |
| Target data | |||
| 7. | {{Conveyance}} | Tick. | |
| 8. |
|
Click [Execute]. | |
Screen 2:
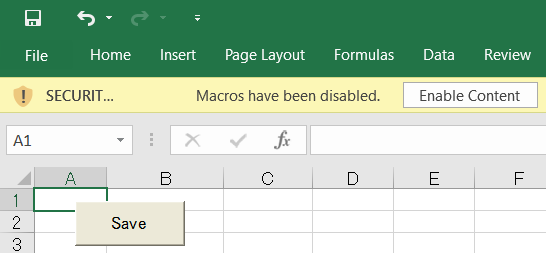
Operation Process:
| 1. | |
Click [Enable Content]. |
Screen 3:

Operation Process:
| 1. | {Necessary/Not necessary} | Enter 'X' (single-byte capital) for any unnecessary data. | |
| 2. | The yellow-colored cells in the first line can be changed. Make changes as necessary. | ||
| 3. | |
Click [Save]. |
Screen 4:
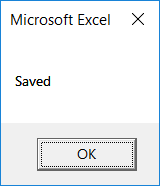
Operation Process:
| 1. | |
Click [OK]. |
Screen 5:
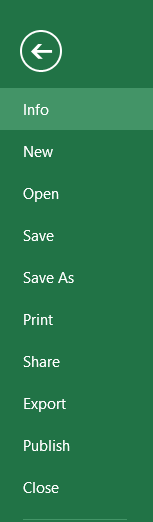
Operation Process:
| 1. | Menu: Excel Icon > Close |
Screen 6:
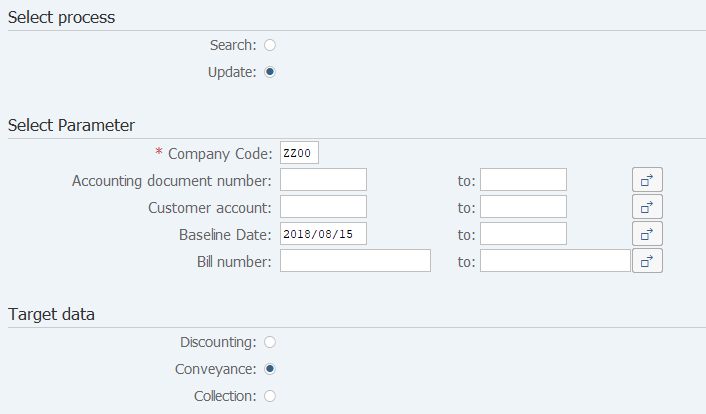
Operation Process:
| Select process | |||
| 1. | {{Update}} | Tick. | |
| Target data | |||
| 2. | {{Conveyance}} | Tick. | |
| 3. |
|
Click [Execute]. | |
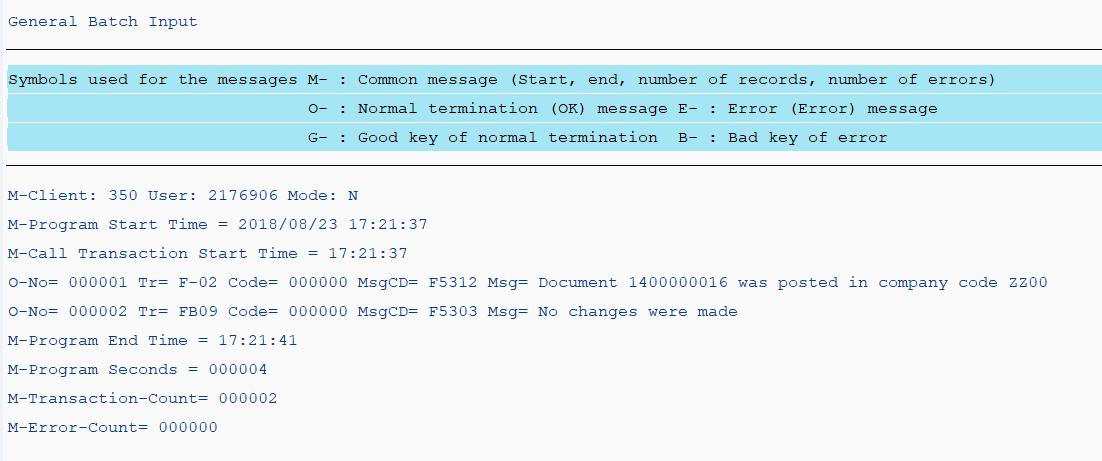
Screen 9:
Operation Process:
| 1. | Make sure that there are no errors. |
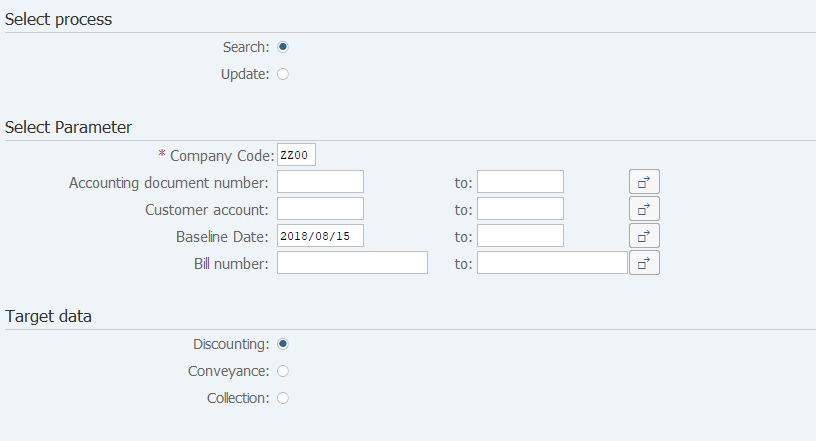
Screen 1:
Operation Process:
| Select process | |||
| 1. | {{Search}} | Tick. | |
| Select Parameter | |||
| 2. | {{Company Code}} | Enter the Company code. | |
| 3. | {Accounting document number} | Enter the Accounting document number. | |
| 4. | {Customer account} | Enter the Customer account. | |
| 5. | {Baseline date} | Enter the Baseline date for payment. | |
| 6. | {Bill number} | Enter the physical bill of exchange number (assignment number). | |
| Target data | |||
| 7. | {{Discounting}} | Tick. | |
| 8. |
|
Click [Execute]. | |
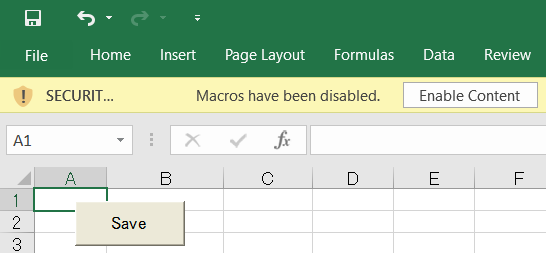
Screen 2:
Operation Process:
| 1. |
|
Click [Enable Content]. |
Screen 3:

Operation Process:
| 1. | {Necessary/Not necessary} | Enter 'X' (single-byte capital) for any unnecessary data. | |
| 2. | The yellow-colored cells in the first line can be changed. Make changes as necessary. | ||
| 3. |
|
Click [Save]. |
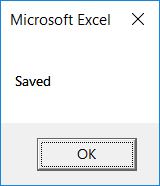
Screen 4:
Operation Process:
| 1. |
|
Click [OK]. |
Screen 5:
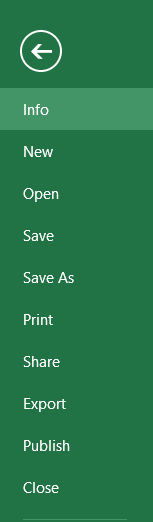
Operation Process:
| 1. | Menu: Excel Icon > Close |
Screen 6:
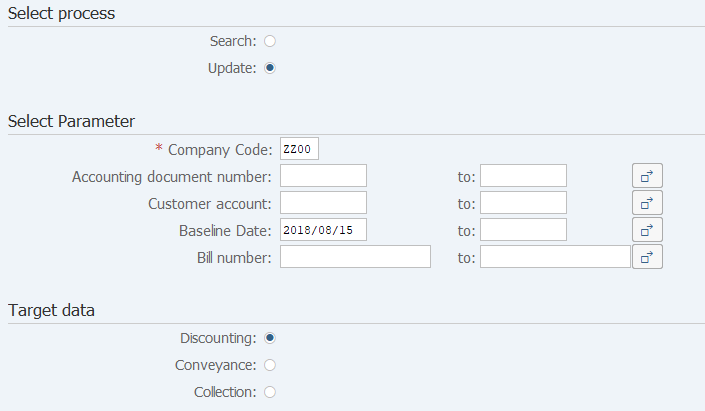
Operation Process:
| Select process | |||
| 1. | {{Update}} | Tick. | |
| Target data | |||
| 2. | {{Discounting}} | Tick. | |
| 3. |
|
Click [Execute]. | |
Screen 7:
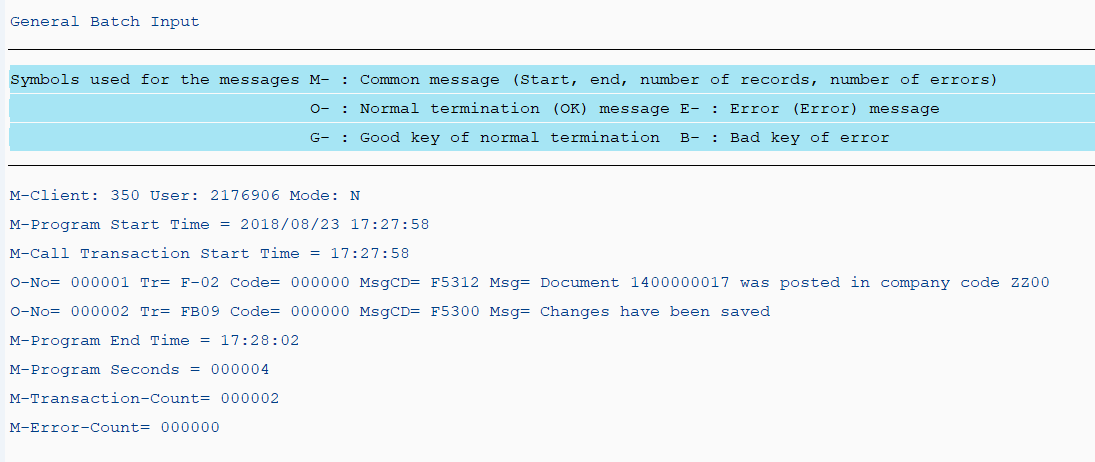
Operation Process:
| 1. | Make sure that there are no errors. |
Copyright(c) MITSUI KINZOKU YOURSOFT Inc.